Autumn may be here, but the change in seasons doesn’t require a complete halt to your gardening. By installing a cold frame in your garden, you can extend your growing season and grow seasonal plants in cooler weather.
What Is a Cold Frame?
A cold frame consists of a bottomless box frame with a top made of glass or clear plastic that allows the sunlight in but protects plants within from cold air. According to Bronx Green-Up, you can build your cold frame to any dimensions you desire. However, their guide recommends a wooden frame that is three feet wide and four feet deep — using untreated lumber if you’re planning to grow food. It also suggests reusing an old window for the top.
You can also build a cold frame using hay bales as insulating walls.

Materials
The Bronx Green-Up guide lists the following materials for building your cold frame.
- 1 2×8 board, 3 feet long
- 1 2×12 board, 12 feet long
- Box of 3½-inch outdoor screws
- Plastic, glass, or old window for the top
- 1 or 2 small door hinges (to join the top to the frame)
You will also need:
- Measuring tape and pen for marking cuts and holes
- Saw
- Drill and drill bits
Instructions
The first board on the list of materials will serve as the front wall. The 2×12 board will need to be cut to create three segments — a 3-foot length for the back wall, and two 4-foot sections to serve as the sides of the frame. Next, cut the two side pieces so that the height measures 8 inches on the front end and 12 inches on the back end.

Image source: Bronx Green-Up
Pre-drill holes in the corners, then join one corner at a time on a flat surface to ensure accuracy. Once the frame has been assembled, attached the top using the hinges to secure the top piece.
Setting Up the Cold Frame
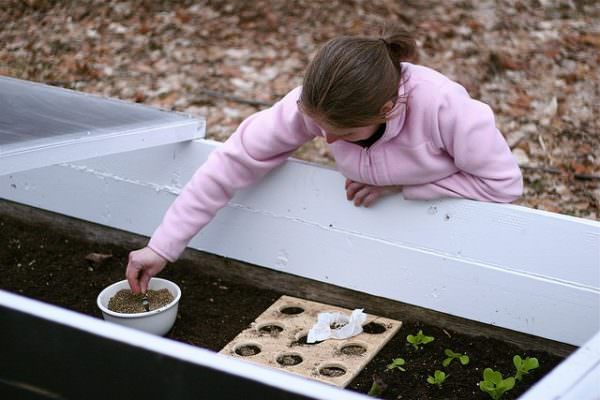
Bronx Green-Up’s guide suggests setting up your cold frame in an area that receives southern exposure, ensuring it will get the most sunlight. Depending on what you’re growing, the cold frame can be used to plant seeds earlier in the spring or later in the fall, then transport the seedlings into your garden in ideal weather. The plants become adapted to their environment better in a cold frame than if you start the seeds in an indoor garden.

Image courtesy of Susy Morris.
Tips:
- Good plants to grow include greens, such as lettuce, arugula, parsley, radish, scallion, spinach, and swiss chard. You will need to harvest them as baby greens.
- Ensure that tender plants are packed kept in pots or pack them with soil, mulch, and leaves for insulation against cold.
- Keep the soil moist, but do not overwater your plants in the cold frame or they could rot.
- On warmer days, the cold frame should be ventilated.
Keeping a thermometer on the surface of the soil can help you determine when it’s time to vent your cold frame. Ideally, in the spring, the temperature inside the frame should be about 70 degrees F, while 65 degrees F is recommended for the fall months. If you’re unsure how much to vent, the Bronx Green-Up suggests erring on the side of venting too much, as it could allow the plants to build up a tolerance to the colder weather and grow hardier.
A cold frame can satisfy your green thumb’s desire to garden all year round. And with little use of materials as well as some reuse, building a cold frame is a green project, too!
Feature image courtesy of Ofer El-Hashahar. Originally published on October 7, 2015, this article was updated in September 2020.
The post Let There Be Light: How To Build a Gardening Cold Frame appeared first on Earth 911.


